
Spring Cleaning: How to Get Rid of Bathroom Mould

As Summer draws ever closer, it’s time to do that final bit of Spring cleaning (essentially all those bits that get ‘forgotten’ throughout the rest of the year). One thing that most of us experience is the dreaded mould spots which start to build up in the bathroom. Regardless of how often we scrub and use domestic bathroom cleaners, it never seems to do any good.
 We set the team to work to try and find a cheap answer, as the alternative of getting the grout of silicon replaced can run into the £100s. The first stop was to try and find an off-the-shelf cleaner that other people had success with.
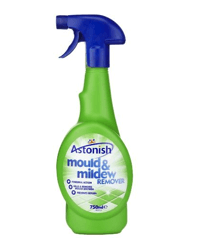
After a few hours of hunting one cleaner came out heads and shoulders above the rest – Astonish Mould and Mildrew Remover.
Scoring over 4.5% for close to 400 reviews, and available for just £3.75 from Amazon.co.uk, it was too cheap not to at least try before any others.
We’ve created a photo diary so you can see the results for yourself, as well as what we had to do to along the way. As you’ll see, you may instantly disregard the product but it’s worth persevering!
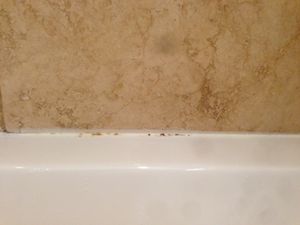
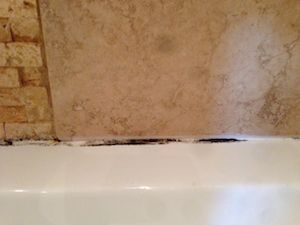 The Bathroom Mould to be Removed
This is a photo of the mould in question, not a pretty site and due to a build up of surface water on the silicon and a lack of light (the area was hidden behind bottles of shampoo and shower gel).
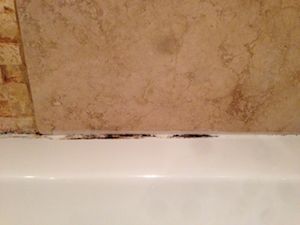 Application 1: Remover left on for a few minutes
True to British form, we decided to use the mould remover exactly as instructed. We sprayed it onto a sponge (to avoid overspray), rubbed the area with the sponge and then wiped off after 4 minutes.
The results were only visible by comparing photos and we weren’t too hopeful.
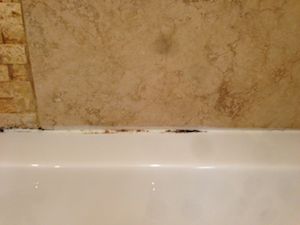 Application 2: Remover left SOAKING for 30 mins
Ok, it was now time to step it up a gear so we decided to leave the remover on for half an hour. We were keen to see if the extra time would give it more of a chance to do it’s job. To prevent the surface drying out we soaked kitchen towel in the Astonish Mould Remover, rolled it up and lay it over the mould.
The results in the photo show just how much of a difference this made.
 Application 3: Remover left SOAKING for 3 hours
Based on the success of getting some kitchen towel involved, the next step was to try leaving it on for hours rather than minutes. We focused on the worst spots, repeating the process of the second application and then sat back while the remover got to work.
The results were impressive and at this point we were glad we hadn’t been put off after the first application.
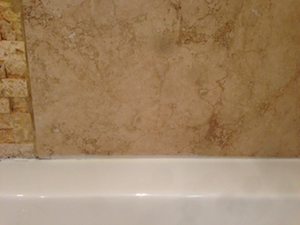 Application 4: Remover left SOAKING overnight
At the end of day 1, the mould had been removed where it was lighter but there were still a few spots to try and get rid of. With nothing to lose we decided to repeat the soaked kitchen towel process and leave this on overnight.
You can see from the final results in the photo that it’s perfect.
From this relatively simple test we were able to get rid of the mould for just £3.75 – pretty good when you compare it to more expensive industrial mould removers.
This product is full of chemicals and we strongly suggest using protective gloves to avoid it damaging the surface of the skin. It also claims to be corrosive to metals, so again make sure you wipe up any overspray on taps or fittings.
That’s all folks, our simple tried and tested guide to getting rid of bathroom mould so your bathroom looks brand new again for another year.