Home Brewing Guide

June 17, 2013
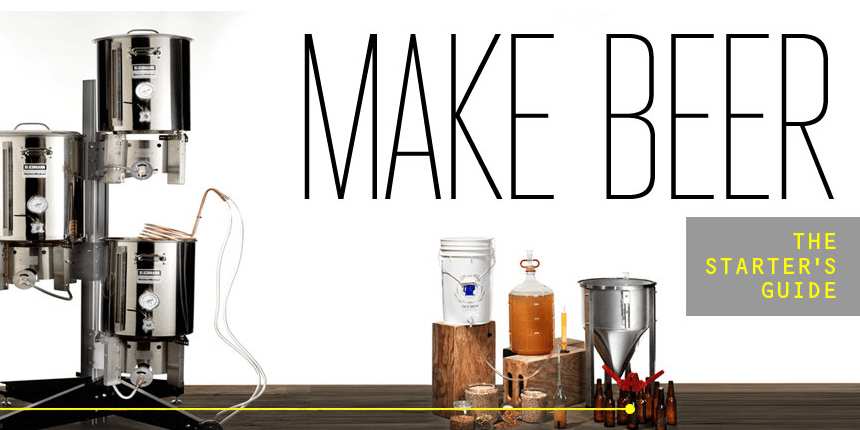
Home brewing has had a reputation in the past of either being done by the older generation who have been doing it for years or by students who are constantly trying to cut the cost of outgoings. This image is now outdated, with micro breweries continuing to rise in popularity and introducing us to new flavours. It’s never been easier to give it a go yourself (on a much smaller scale) and there are huge cost savings in the long term, even compared to standard lager bought in the supermarket.
You can get set up for around £25 for the kit itself if you don’t buy a keg, with the ingredients for the beer itself costing around £10 for every 40 pints produced. Once you’ve got the equipment you’ll just need to buy the malt kit each time (which is where you get the flavor so you can pick stouts/ales/lagers etc), the yeast and the sugar.
1) Use the sterilizer to thoroughly sterilize the equipment before you do anything else. This includes the bucket, keg (if you have one), paddle and siphoning tube. This is the most important step as all other steps won’t matter if you get this wrong – the process is likely to take around 30 minutes including waiting time for it to work it’s magic. The result of your equipment not being sterilized is imperfections in the beer itself, which will cause the taste to be ruined.
2) Heat the concentrated malt can in a pan of boiling water to help loosen the contents. After a few minutes pour the contents into your large 20 litre (or 40 pint) bucket and add boiling water as per instructions on the can. Use the paddle to stir thoroughly until the concentrated malt has dissolved into the water.
3) Add sugar and then top up the bucket with cold water – your aim is to get the water to around 25°C (just over room temperature).
4) When you’re happy with the temperature, add in the satchet of yeast and stir well. Temperature is vital at this point as if the water is too hot it will kill the yeast, which means no fermentation will take place (and therefore no alcohol will be produced).
5) Attach the lid and then move the cupboard to a warm part of your home, from 21-27°C, for the fermentation process to take place. The airing cupboard is an ideal place for this, or alternatively the top of the stairs on the landing should also work well. Leave for 7 days and check regularly that bubbles are being produced, you may need to release some pressure by adjusting the lid slightly.
6) Use the siphon tube to get the beer from the bucket into the keg or bottles. You need to first prime the bottles or keg with sugar so when it reacts with the yeast, carbonation takes place to produce gas in the beer. If you are making lager rather than ale, use bottles as you’re more likely to get more gas produced, resulting in the traditional fizzy bubbles you expect. With ale, on the other hand, you don’t want it to be too fizzy and so a keg is best to use. The bottles or keg should then be left in the same warm place for another 5 – 7 days.
7) The final step is to move the beer to a cool part of your house in order for the clearing process to take place. Essentially this is where the sediment will drop to the bottom of the vessel, and so it should be a cold place where the bottles won’t be disturbed. These should be left for a minimum of 1 week and they will then be ready for testing.
The whole process takes around 3 weeks in total, but if you have a couple of buckets and plenty of bottles or kegs you can brew a new batch of 40 pints every week.
What you’ll need for brewing beer
- 20 litre bucket with lid (£8)
- Plastic keg or bottles (£20 for keg)
- Stirring paddle (£1.50)
- Siphon and tubing (£2)
- Yeast (£1)
- Sugar (£1.50)
- Concentrated malt (£8 for 3kg tin)
- Sterilizer solution (50p)
You can get set up for around £25 for the kit itself if you don’t buy a keg, with the ingredients for the beer itself costing around £10 for every 40 pints produced. Once you’ve got the equipment you’ll just need to buy the malt kit each time (which is where you get the flavor so you can pick stouts/ales/lagers etc), the yeast and the sugar.
Step-by-step guide to home brewing
So now you’ve got everything to get started, below is a simple guide to making your first batch. You can then adjust the process based on what you find works for you to get the best brew each time, together with any specific instructions that come with the beer kit you buy.1) Use the sterilizer to thoroughly sterilize the equipment before you do anything else. This includes the bucket, keg (if you have one), paddle and siphoning tube. This is the most important step as all other steps won’t matter if you get this wrong – the process is likely to take around 30 minutes including waiting time for it to work it’s magic. The result of your equipment not being sterilized is imperfections in the beer itself, which will cause the taste to be ruined.
2) Heat the concentrated malt can in a pan of boiling water to help loosen the contents. After a few minutes pour the contents into your large 20 litre (or 40 pint) bucket and add boiling water as per instructions on the can. Use the paddle to stir thoroughly until the concentrated malt has dissolved into the water.
3) Add sugar and then top up the bucket with cold water – your aim is to get the water to around 25°C (just over room temperature).
4) When you’re happy with the temperature, add in the satchet of yeast and stir well. Temperature is vital at this point as if the water is too hot it will kill the yeast, which means no fermentation will take place (and therefore no alcohol will be produced).
5) Attach the lid and then move the cupboard to a warm part of your home, from 21-27°C, for the fermentation process to take place. The airing cupboard is an ideal place for this, or alternatively the top of the stairs on the landing should also work well. Leave for 7 days and check regularly that bubbles are being produced, you may need to release some pressure by adjusting the lid slightly.
6) Use the siphon tube to get the beer from the bucket into the keg or bottles. You need to first prime the bottles or keg with sugar so when it reacts with the yeast, carbonation takes place to produce gas in the beer. If you are making lager rather than ale, use bottles as you’re more likely to get more gas produced, resulting in the traditional fizzy bubbles you expect. With ale, on the other hand, you don’t want it to be too fizzy and so a keg is best to use. The bottles or keg should then be left in the same warm place for another 5 – 7 days.
7) The final step is to move the beer to a cool part of your house in order for the clearing process to take place. Essentially this is where the sediment will drop to the bottom of the vessel, and so it should be a cold place where the bottles won’t be disturbed. These should be left for a minimum of 1 week and they will then be ready for testing.
The whole process takes around 3 weeks in total, but if you have a couple of buckets and plenty of bottles or kegs you can brew a new batch of 40 pints every week.


